Gratitude, Love, Overwhelming Fondness + Poached Pears

Image

In the past week I have fully submerged myself into the amazing supportive loving community that is B School. I have {already} met some absolutely amazing people and am completely saturated with the most insane amount of joy. I’m so overcome with gratitude and love, the constant display of support is so gorgeous. It’s so inspirational to see, to be a part of, and to have access to. I have been feeling so celebratory and so full of creativity that business ideas are just popping out of me like fireworks! Crazy, colorful, beautiful fireworks.

Of course……  I’m not sure what to do with them yet, so they are here, tucked away in my pretty little note book just waiting for their opportunity to jump out and make dreams come true. That’s what it’s all about for me right now, really, keeping track of all my dreams and paving the way for them to become reality.  Maybe the cement trucks and the handy dandy workers who pave those streets have yet to arrive – but the blueprints, they are being drawn.

Image

Embracing the time change, the spring ahead (super fantastic time of year), and the giant step I have taken before I’m quite ready… Is cause to celebrate.  I am celebrating with flower petal and mint nature-fetti, sprinkled absolutely everywhere! Mega color therapy, amazing freshness, and completely organic!

Image

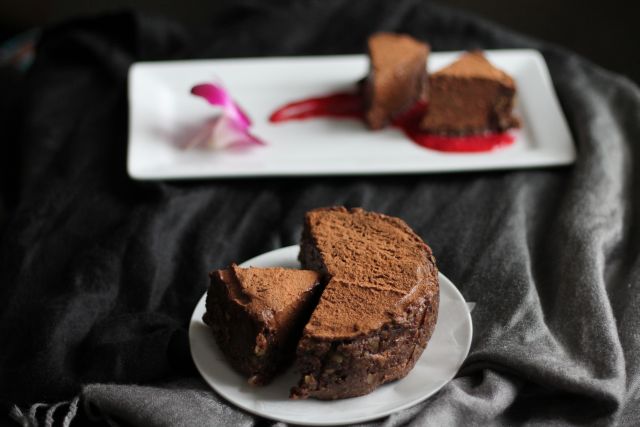
Pears, slightly unripe are left to soften and absorb a beautiful and slightly spicy soaking liquid before topping a thick layer of fresh young coconut cream. Really light, really easy, and so beautiful. The nature-fetti of course is the fun part, having had a quick discussion about kids in the kitchen with a group of fellow B School adventurers it occurred to me – what child doesn’t love throwing confetti? I mean really….  even for adults, get in touch with that inner child and go wild. I sure did.  So, leave the pears spiced and naked then employ tiny hands to help with the decorating! Hello to super fun bonding! Especially come summer, when the flowers can be picked and torn (or left whole!) together in the yard! When I have kids, you can bet your butt my little darlings will have flowery crowns and talk about Earthing. Spreading nature-fetti all over the place.

Image

Poached Pears, Coconut Cream & Nature-fetti
serves 2

2 Unripe Pears
2.5 Cups of Water
4 Tbsp Honey
Finger Sized Knob of Ginger
1/2 Tsp Coconut Oil
1 Tsp Rosehip Powder
1/2 Cup Young Coconut Meat
Pinch of Vanilla Powder
Edible Flowers
Mint

Add 2 cups of the water to a smallish pot, along with the honey. Peel the ginger with the blunt end of a spoon, slice it and pop it in the pot as well. Bring the water up almost to a boil then turn it down to maintain the movement in the mixture. Peel the pears – leaving the stem and bottom in tact, then gently place them on their side in the pot. Turn the heat down to medium-low and rotate with a spoon, gently, every few minutes. After about 10 minutes, remove from the heat completely, add the coconut oil. While that sits, add the coconut meat and the remaining half cup of water to a high speed blender, whirl until it’s thick and creamy. Once the pears have cooled remove them from the pot, placing them somewhere to continue resting until the dish is ready to be assembled. Put the pot of ginger honey pear water back onto the stove, and whisk in the rosehip powder. Reserve for plating. Gather the flowers and the mint together, have fun with it, you may remove each petal & leaf; keep the flowers whole and stem the mint, or rip the petals and the mint into smaller pieces! Store them in a bowl in the fridge until ready to use.

Assembly

Divide half of the coconut cream per pear, scooping it onto one large plate. Arrange the pears on top of the cream, leaning against each other if necessary. Sprinkle with vanilla.  Using a soup spoon or small ladle, surround the pears and cream with some of the reserved soaking + rosehip water. Drizzle the top of each pear gently. Now the nature-fetti! Get creative! Toss, throw, blow out nature-fetti kisses from your hand! Just get those little beauties everywhere!

Image

Orange & Lavender Vanilla Bliss

Image

I saw something while grocery shopping recently that made me so excited. Tiny little loves. Kumquats! Incredibly cute, perfect for a pucker. I decided to buy a handful of them (of course), then when I got them home I wasn’t really sure what to do with them. I mean, curd came to mind – some kind of a vegan curd. Maybe not a vegan curd.  They were too cute and would be way too much work to try to juice or smoothie them. Dehydrate, well maybe – but I figured I should at least try to make something with them before I go sucking the moisture out.

Image

Eventually, many serious puckers later – I decided to zest the heck out of them, and simply mix them with the abundance of other citrus in my fridge.  Citrus that I had been planning to make a little vegan cake with, a raw cheesecake. Creamsicle style.  No big deal, just a layer of smooth and creamy vanilla topped with a punchy orange lavender layer.  No swirling, no extras, just simple summer-style creamsicle flavor. Not that it’s summer… or even anywhere close – but hey.

The subtle floral aroma coming from the lavender really pulls it all together for me, sort of changes the childhood favorite to a more adult, more classy option.  Not that there is anything wrong with amazing orange creaminess on a stick, but there is just something so so satisfying about slicing into a cheesecake. You know?

Image

Orange & Lavender Vanilla Cheese Cake

Crust

1.5 Cups Almond Meal
1/4 Cup Macadamia Nuts – Soaked for 30 minutes
3-4 Tbsp Plant Based Milk of Choice
1/4 Cup Coconut Oil – melted
3 Tbsp Lucuma Powder
Pinch of Dried Vanilla Bean Powder
Pinch of Himalayan Salt

In a blender or food processor, pulverize the soaked macadamia nuts, milk and melted coconut oil until it forms a thick cream. Transfer to a bowl and add the almond meal, lucuma,vanilla and salt. Mix until it forms a dough. Line a spring form cake pan with wax paper, then firmly press the crust mixture down into the bottom. Try to make it as even as possible, place in the fridge to set while preparing the rest of the cake.

Vanilla Layer

1/2 Cup Coconut Cream
2 Vanilla Beans
1/4 Cup Plant Based Milk of Choice
1/2 Cup Coconut Oil – Melted
1/3 Cup Raw Honey
2 Cups Cashews – Soaked for at least 4 hours

Using a sharp knife, slice the vanilla beans in half and gently scrape out the seeds. Place both the scraped seeds and the whole bean to a bowl and cover with coconut cream. Allow the coconut cream to infuse for at least 15 minutes. Meanwhile, in a high speed blender, blend the soaked cashews with the plant based milk, adding the coconut oil once it has cooled and following with the honey. Remove the whole bean pod from the coconut cream, leaving the seeds, then add the coconut to the cashew mixture. Pour over the prepared crust.

Orange & Lavender Layer

1/2 Tbsp Lavender Flowers – Dried
1/2 Cup Coconut Cream
1 Cup Macadamia Nuts – Soaked for 30 minutes
Zest From 1 Large Orange
1 Cup of Fresh Citrus Juice
(I used a combination of kumquat, blood orange and navel)
2-3 Tbsp Raw Honey

Using a pestle and mortar, crush the dried lavender flowers until they are soft. Place them in a bowl with the coconut cream and set aside. Using a high speed blender, blend the macadamia nuts with the orange juice and the honey. Allow the mixture to come together forming a thick cream, then add the coconut and continue blending. Transfer to a bowl and stir in the zest before pouring over the vanilla layer. Place the cake in the freezer for 3 hours, or over night.  If allowing it to set up over night in the freezer, take it out 2-3 hours before serving.

Image

It’s a Celebration!

Image

It’s been a long time coming…. this celebration.

I had been planning to write a food blog for a while, didn’t really know how… figured it would be super complicated…  I’m not at all tech savvy, so basically I put it off because I was afraid of it. I had been creating recipes, taking pictures, saving files – you name it. I was doing it. Then, in an emotional tantrum I accidentally deleted everything I had been saving up. Absolutely all of it. From that day, it took me another four months to even consider starting up this blog. I suppose, maybe I had taken it as a sign from the universe that I just wasn’t ready to write (yes, sometimes I am unreasonably emotional).

Image

So finally, I did it.  I told myself that I would not register a domain until I had had the blog for a full year, and had made more than five or six posts.  It’s not that I typically give up on projects, it’s just this one had given me some grief and I was starting it up in a personally vulnerable time.  In reality, it ended up being the outlet that I needed to get myself up and at ‘er and I have since clearly made more than five or six posts.   In fact, in this first year (and a bit) I have filled a bound journal with double sided pages of hand written recipes, some successes and some flops.  I have begun a photography certification course, originally starting because I wanted to learn how to photograph food of course; a certification that has now blossomed into a whole secondary passion. Another wonderful creative outlet that makes me so happy, and is so rewarding.

Image

Starting this blog has made me realize so many things about myself. It has been freeing personally, and has helped me grow exponentially. Having a creative outlet is one of the best things we can do for ourselves, seriously. The first year anniversary of my blog was in September, this celebration as I said – has been a long time coming.  Finally this morning I have made good on that promise and have purchased my domain. Woo! Hooray! Yippeee! http://www.sproutinganoldsoul.com exists! In celebration, I paired together ingredients from some of my older dessert recipes (Avo Cacao Pudding & Banana Chocolate Tarts) and created a *nut free* raw chocolate mousse cake.

Chocolate Mousse Cake

Crust

1 Cup Dried Black Mission Figs
3/4 Cup Pumpkin Seeds
3 Tbsp Cacao Nibs
Pinch of Himalayan Salt
6 Tbsp Water

Mousse

3 Ripe Avocados
1 Ripe Banana
2 Heaping Tbsp Raw Honey
1/2 Cup Cacao Powder

Plating

1/3 Cup Raspberries (fresh or frozen)
Splash of Water
Cacao Powder for Dusting

Soak the figs in warm water until they are squishy. Add the figs, pumpkin seeds, cacao nibs, and salt to a food processor – start with two tablespoons of water. Give the crust a whirl. Continue adding one tablespoon of water at a time while the food processor is running until the crust forms a thick paste. Six teaspoons may not be required depending on the moisture in the figs, but six was how many it took for me. Start with less, you don’t want the crust to be too squishy! Line a small-medium spring-form cake pan with wax paper. Push the figgy crust into the pan or shape into small tart shells by hand, then place it in the freezer to set.

To make the mousse, simply add all ingredients into a fresh food processor and whirl until there are no chunks of avocado or banana and a thick mousse has formed. Gently scoop it into the crust, cover, and let it set up in the freezer overnight or for at least six hours. This will ensure the mousse will be able to slice.

Depending on the temperature indoors, remove the cake from the fridge 1 to 2 hours before serving. Blend the raspberries with a touch of water and spread on a plate to be used as a garnish under the cake, or use as a drizzle over top. Sprinkle the top of the cake with the extra cacao powder and slice it into pieces.

Voila!

Autumn… In Pudding Form

Image

While looking for the perfect, single sized pumpkin…..  I came across a beautiful, single sized Hubbard squash.  The only thing I knew about Hubbard squash, was that they are starchy something like a potato and require a majorly sharp knife.  Typically the Hubbard squash I have seen are massive, seriously huge – when you see them at the farmers market, sometimes they can be 20lbs.  This little gem was the perfect size, it supplied me with enough of it’s starchy meat for three palm sized tarts and about a cup and a half of extra puree.

I am all for pumpkin pie, all for it.  I love the warm spices, the creamy filling, the whipped (vegan) cream on top – give me the works and I will be a happy girl. I had the privilege of eating a freshly baked sugar-pumpkin pie earlier in October, there was, I think six of us…  sitting on the couch waiting for it to cook.  We couldn’t even wait for it to cool down enough to slice, all six pieces were inhaled.   Essentially ever since, I have been dreaming of it – hence my search for the perfect single sized pumpkin.

Image

I’m not ashamed to say, the Hubbard did not do it for me in tart form. It was good – but it wasn’t pumpkin. It wasn’t creamy and smooth, the starchiness of the Hubbard flesh was just that. Starchy. The left over puree, however, became the perfect autumn topping to the chia pudding I made for breakfast! Mmmm-mm.  Warm spices, creamy chia, let me tell you – the squash was an excellent addition. It cut the creaminess of the pudding, added some sweetness (I never sweeten my chia pudding, I rely on fruit to do that for me!).   Rich in vitamins A & C, beta-carotene and fiber, adding a gorgeous winter squash to the diet is a great way to eat seasonally, locally, and if it’s something unusual – why not? I didn’t know much about this gem of a squash but am so happy that I took the opportunity to buy one.

IMG_2153

I ate the first one out of a martini glass, tricking myself into thinking I was sneakily eating a rich and indulgent dessert parfait. The second one (yes, I had two) was layered into a hand-sized mason jar and taken on the road!  It could certainly be enjoyed as a dessert parfait, or a breakfast to-go.  I love whole, real foods for their versatility; eating things that are pure any time of day. Chocolate avocado mousse, banana ice cream, or a seriously amazing parfait – these are not limited to special occasions or after dinner treats anymore!

Spiced Maple Hubbard & Chia Parfait
Serves Two

1 Cup Rice Milk (or other non dairy milk)
1/3 Cup Chia Seeds
1-1.5 Cups of Cooked Hubbard Squash
Juice From One Orange
1/2 Tsp Cinnamon
Fresh Ground Nutmeg, Ginger, Clove, Allspice – to taste
1/3 Cup Coconut Cream
3-4 Tbsp Dark Maple Syrup

Optional Toppings

Bee Pollen
Nuts
Seeds
More Spices
Drizzled Maple Syrup

One night ahead, preheat the oven to 350. Add about one inch of water to an oven proof dish, slice the Hubbard squash in half and roast cut down for about thirty minutes (or until the skin is easily pierced with a fork). Once the squash is soft, allow it to cool, then chop and skin it. In a food processor or blender, add the squash, orange juice, spices, coconut cream and maple syrup. Blitz until it is smooth. Transfer to a jar and refrigerate. Next, in a jar or some container with a lid mix the rice milk and chia seeds. Give it either a shake or a stir, then let it form in the fridge for an hour or so. Just before bed, give it another shake/stir, and let it set in the fridge over night.
Scoop out half of the chia pudding into a bowl/jar/martini glass. Spoon the prepared squash puree, and top with slivered almonds, bee pollen & a quick swirl of maple syrup!

Birthday Cake Adventures

Image

The cake pictured above is something I am pretty proud of.

I knew that I wanted to make a birthday cake for myself this year, and I knew that I wanted it to involve beets.  That was it, really. I had been flip flopping back and forth about when I wanted to make it, how I wanted to make it, essentially every variable was considered.  I had pegged from the beginning that it likely wouldn’t work. Baking is just not my thing.  I arranged all ingredients, everything was prepared – and then I gave up, left my house even.  Fearing that it would be a failure, I decided to save it for the next day. Determined to make it work I brushed up on baking 101, refreshing myself on essentials like when to use baking soda versus when to use baking powder. Compared dense flours, grain flours, coconut flour, nut flour, you name it. To sum it up – it took me a grand total of two tries, four days, and two very pink stained hands before I could finally say I had done it. Happy birthday, to me!

Image

With all the rave about pumpkin cakes, and carrot cakes – I wanted one of my favorite root vegetables to take the spotlight. Beets.  I love them. Must be the Ukrainian in me!  They are so vibrant and beautiful, for myself – a huge fan of eating a range of natural colors – it was a no brainer.  Beets, it had to be beets. I considered blending them, allowing them to lend a bit more color to my cake batter; in the end however, I simply grated them.

Another ingredient I used for this cake has had a bit of buzz around it in the last while, Irish moss. Irish moss is a sea vegetable that has been used in a number of different cultures for many many years. I myself have been looking for it in Calgary for quite some time, stumbling across it accidentally after taking part in a honey lecture. I took the time to speak to some people in the holistic community here in the city – it seems that Irish moss is getting a bad name in the same way that other foods in our world are, it’s all about refining and processing. Carrageenan is a refined and broken down part of Irish moss which can be used as a thickener or stabilizer. Most people who are familiar with this refined additive have opted to omit it from their diets as it is known to cause inflammation. That is why I wanted to get some face to face information about it, from people who were familiar with the actual plant. It was broken down for me like this:  Irish moss in it’s natural form is incredibly good for the skin, it contains trace minerals and since it is mucilaginous it is very soothing for the digestive system as well as grabbing onto toxins and heavy metals as it passes through our system (think chia). Carrageenan is a highly processed version of Irish moss, heated to extreme temperatures and essentially void of anything earth related, being more comparable to a chemical byproduct. So to compare it something more widely understood, sucking on raw sugar cane versus gulping back half a cup of white sugar …  well really there is no comparison, and I suppose that’s my point.  From the information I have gathered, in moderation using something natural like whole Irish moss is not going to have a negative impact on our health. If the use of Irish moss is still something that is unappealing, something like arrowroot powder or agar agar could be substituted.

Image

Image

Chocolate Beet Birthday Cake

2 Cups of Fine Milled Flour (Spelt is my choice here)
1 Cup Oat Flour
1 Cup Cacao Powder
2 Tsp Baking Soda
1/2 Tsp Black Lava Salt
1.5 Cups Hemp Milk (or other non dairy milk)
1/2 Cup Unsweetened Apple Sauce
1 Cup of Honey
1 Tsp Chocolate Extract
1 Tbsp Vanilla Extract
2.5 Cups Shredded Beet
1/3 Cup Cacao Butter – Melted & cooled
1.5 Tsp Apple Cider Vinegar

Filling

1 Cup Macadamia Nuts – Soaked for 2 hours
2 Tbsp Lucuma Powder
1/2 Cup Water
Pinch of True Cinnamon
Vanilla Bean – Scraped
2 Tbsp Honey
1/3 Cup Irish Moss Gel

Frosting

2 Cans of Coconut Cream – Chilled
Powdered Sugar (organic cane or coconut)

Two days ahead, soak the Irish moss in water, it can be left out over night on the counter. One day ahead prepare the coconut frosting, this will give it a chance to firm up. In a medium sized bowl or using a stand mixer, empty the coconut cream (note – coconut cream. Not coconut milk. If using coconut milk, only use the fat solids that are on the top – save the water for smoothies. You may need a few more cans) and the powdered sugar together, whip until it’s fluffy and sweetened to your liking, store in the fridge.
To make the Irish moss into a gel, rinse it once it has soaked, make sure there are no loose fibers or sands remaining in it. Mix it with some fresh water in a blender, and whirl away until it heats up with the motor and turns into a thick gel.
To make the filling, blend the soaked macadamia nuts, lucluma, water, cinnamon, vanilla and honey in a high powered blender. Once it is creamy, add the Irish moss and pop it in the fridge.

Preheat the oven to 350, prepare two same sized cake pans by lining the bottom with wax paper and rubbing coconut oil up the sides. Mix the flours, cacao powder, baking soda, and salt in a large bowl – set aside.  Melt the cacao butter over low heat, keep it in the pot but away from heat once it has fully melted. In another good sized bowl, add hemp milk, apple sauce, honey, vanilla and chocolate extracts, beets, and apple cider vinegar. Slowly pour the wet ingredients into the dry, begin mixing the two together right away as the baking soda will start to work quickly. Add the cacao butter in right before the mixture is fully blended. Pour evenly into the prepared cake pans, turning the oven down to 300 and putting those babies in! Bake them for 35 minutes, or until a toothpick inserted into the middle comes out clean.  Allow the cakes to cool completely.  Once they have cooled, place one cake on a cake stand and slather the top with the macadamia filling. It should have firmed enough over night that you can place the second cake on top without it oozing out. Once the second cake is in place, remove the coconut whip from the fridge and frost starting with the top, working down the base.  Keep in the fridge, taking it out one hour before serving.  *I garnished mine with raw, dried coconut strips and fresh flowers, but that’s optional!*

Image

Gratitude With a Side of Apple Pie

Image

This weekend was filled with food, family, and thoughts of gratitude. This weekend, was Canadian Thanksgiving. A celebration of harvest, of foods, and of the fall. Joining and breaking bread with family members, neighbors, and the like; truly appreciating the bounty of the summer.

Stopping to think about what Thanksgiving is, about what the day means now as opposed to what it meant traditionally is a thought I find very interesting.  I can appreciate that we still gather with loved ones, but I wonder if people really stop to give thanks. I wonder if half of the population even knows exactly what they would give thanks for, if asked to name a few.  I have a white board beside my bathroom mirror that reads “Today I am grateful for…”, I try to use my time in the shower to list all of the things I can think of. The typical things come to mind, my family and friends – all of those I love and hold dear. The opportunities that I have, for a great job and workplace, for a home.   One thing that I tend to forget, funnily enough, is food. I can’t say I remember lending thought into being thankful for having a fridge full of food. High quality, organic, healthy food at that.  I’m ashamed to say that it has not been something I think about. Isn’t that ironic? I regularly honor the planet, Mother Earth, thanking her for the gifts that she bestows upon me and my loved ones – however once those treasures have been plucked from her, my thoughts are focused primarily on what to do with them.  I think that that is the most important thing for us to do, to find where the disconnect is. Figuring out where I/we have lost sight of food as a life-sustaining gift, not just viewing it as a creative one. Reconnecting with local growers and producers, shortening the distance therefore nipping that disconnect.  I am so grateful to have the creative ability to use food as an art, as a medicine, but on a more primal level – I am so grateful to simply have enough. To be able to feed myself, and my visitors.  I will certainly remember to recite this gratitude more often. I don’t want to let these things depart from my mind, I am fortunate to have a table full of food when people all over the planet do not.  I don’t mean to be offensive to anyone, I just want it to be known that I am thankful.  Known to myself, and to those who care to listen. Maybe if all of those who are fortunate enough to have a table full of food tonight stop and think about that meal – about where it came from, what went into it.. both effort and ingredients….   I always loop myself back to mindfulness.  It’s all just so important.

Image

My dad enjoys spending time outside, he takes very good care of his green space and has a great assortment of trees and plants. One of his trees, an apple tree, produced a whole shwack-load of very handsome looking apples. A variety of green and red, tart and delicious. Given a good sized bag of them a few weeks ago, I have been eating them in the form of spicy apple jam.  Today however, after spending so much time thinking about being thankful, about closing the disconnect between plant and plate, and after hearing about a pie craving from my darling boyfriend – I really had no other choice but to put the remainder of my dad’s apples to good use. Unfortunately for le boyfriend, he is away in another city for work.. and a hardy, healthy apple pie makes a wonderful breakfast pour moi =)

Image

Rustic Chai Spiced Apple Pie

Crust

2 Cups Gluten Free Flour (spelt or whole wheat would work as well)
2 Tsp Cinnamon
1/2 Cup Coconut Oil – room temperature
5-7 Tbsp Ice Cold Water

Heat oven to 325. In medium sized bowl, combine the flour, cinnamon and coconut oil with a pastry blender. Add one tablespoon of water at a time while cutting the mixture, until the dough is crumbly. Empty the bowl into a glass pie plate, pressing the crust along the edges and evenly spreading it over the base. No rolling necessary. Prick with a fork across the base, bake for 15 minutes then set aside.

Filling

3 Tart Apples
3 Whole Cloves
2 Allspice Berries
5-6 Green Cardamom Pods
1 Tsp Grains of Paradise
1 Vanilla Bean
2 Tsp Ground Cinnamon
1 Tsp Ground Ginger
1 Tsp Orange Blossom Water
2 Tbsp Fresh Lemon Juice
3 Tbsp of Water
1/2 Cup Coconut Sugar

Topping

2 Cups Slivered Almonds
3 Tbsp Honey

Peel, core and slice the apples, popping them in a medium sized bowl. Using a mortar and pestle, grind the clove, allspice, cardamom seeds, and grains of paradise. Scrape out the vanilla bean, and add it with the freshly ground spices to the apples. Stir to coat. Next add in the cinnamon and ginger, followed by the orange blossom water. Once again, stir to coat. Add in the lemon juice, water and coconut sugar, lifting with a spatula the spiced liquid in the bottom of the bowl over top of each apple slice.
Arrange spiced apple slices in prepared pie crust, overlapping as necessary. Spoon the liquid from the bottom of the apple bowl over apples, giving a final coat to the top layer. Bake, still at 325, for about 25-30 minutes. While the pie is cooking, in a small bowl combine the slivered almonds with the honey, ensure each almond is covered. Once the apples are soft, sprinkle the top evenly with almond mixture and return to the oven for another 15 minutes.  Allow to cool before slicing – and enjoy!

Image

A Raw Chocolate Adventure!

You’d think I have a sweet tooth…. Wouldn’t you?

Image

Having a growing fascination of cacao, the logical next step in my kitchen was to make chocolate.   Not melt already pressed chocolate chips, or squares…  actually make it.   I searched all over the city for a metate, I mean….  might as well go all out right? A metate is essentially a pestle and mortar that is a flat. It’s been used traditionally for milling grain, and more importantly by the Mayans – for making chocolate.  Grinding the raw cacao on a metate until it turns to a shining smooth liquid…  perfection. Of course I need one.   Unfortunately, my search yielded no such luck…  this left me with two choices: pestle and mortar or my antique spice grinder (enter my determination to not go the easiest route and use cacao powder…).  I tried both.  I do not recommend a spice or coffee grinder, there is just way too much fat in the cacao, it really gummed up inside.  Pestle and mortar… worked a whole heck of a lot better.. I have the blistered hand to prove it!

Image

I wanted to make my chocolate with a mix of raw cacao butter, and raw coconut butter… I’m on a bit of a coconut butter kick. I find it so sinful, it’s so tropical and amazing..  and with added health benefits. I just love it. Why wouldn’t I add it? A touch of flare to my little raw chocolate making madness.

Image

The raw chocolate movement is becoming so widespread, people wanting to know about the cacao plant itself, about the legends that surround chocolate, not just picking up a “candy” bar in the convenient store based on it’s wrapper. It’s amazing, I love it.  I feel that the shift in the global mind of the world towards being familiar with your food, the ingredients and energy that go into it… it’s perfect. It’s about time. If we are becoming more interested in adding raw, creative foods into our diets – why not start with something as delicious, nutrient dense and famed… as chocolate!? Just reading about how it was used as an ancient currency is enough to suck me into researching for hours.  I am fully able to have my very own ancient adventure… just by biting into one of these babies.

Image

Raw & Dark – Crunchy Chocolate Bites

3/4 Cup Raw Cacao Butter
3 Tbsp Raw Coconut Butter
1 Cup Raw Cacao Powder
3 Tbsp Raw Honey (agave, stevia, maple syrup for fully vegan options)
2-4 Tbsp Raw Cacao Nibs

Optional Super Awesome Toppings:
Cassia/Cinnamon
Marash Chili
Bee Pollen
Tiny Roses or Lavender Flowers
Maca Powder
Spirulina Powder
Goji Berries

Heat up a pot of water on the stove, remove it from the heat once it’s starting to steam. Place a glass bowl over top of the pot, allowing the bowl to heat up as well.  Gently melt the cacao butter and the coconut butter in the warmed bowl. Be patient, this can take some time depending on how large your bowl is. Both coconut and cacao butters/oils melt easily with little heat.  Once it has fully melted, add the cacao powder and the raw honey, stirring and incorporating as you add. Toss in the cacao nibs and give one final fold. Pour the liquid chocolate into cups or trays,  sprinkle with optional toppings if you so desire. Place in the fridge or freezer to set.  Store in the fridge.

Image

*Note – if cacao butter is not something you’re able to find, using coconut oil is another great option.  Coconut oil melts much faster than cacao butter does, so be absolutely sure to keep the chocolate refrigerated.

Image

Lemon Macaroons… the perfect blend of sweet and tart!

Image

Yum.   Really….  seriously… yum!

I have made macaroons a grand total of twice.. ever.  Once cooked, and I didn’t like them at all – and these ones.  Which are divine. An exceptional blend of exotic coconut, tart lemon and raw honey.  They are just perfect, especially for the summer season.

Image

Coconut is so super healthy, especially for those following a vegan diet as vegans can often be lacking medium-chain fatty acids. Coconut is antiviral and can be particularly helpful countering viral flare ups in those with a lowered or compromised immune system. Coconut is antimicrobial, antifungal, and boasts a high antioxidant content, all around just a fantastic tropical nut.  I recently purchased a jar of raw coconut butter, as well as my typical raw coconut oil…  the smell of that butter, oh my…  it’s so rich and beautiful.   I feel so lucky that my store shelves are every week becoming more and more stocked with amazing raw finds like that.  The awareness that is reaching people all over, encircling anyone who is willing to listen – it’s perfect.  Being able to choose between raw, unrefined, natural foods.. and processed foods.  Having the literature readily available whether in print, or online about what heavily processed foods do to the body, and having science to back it up.. it’s so helpful.  I think that the combination of dollar voting for organic, whole, raw, ethical, local etc… and the abundant information available virtually everywhere is an amazing start to a nourishment shift. A food shift.  A life, humanity, planetary shift.  I love it!

Image

Lemon Macaroons

1 Cup Raw Almond Meal
1 Cup Raw Dried Coconut Flakes (plus a bit extra for rolling)
4 Tbsp Raw Coconut Butter
2 Tbsp Raw Coconut Oil
1 Lemon
2-4 Tbsp Raw Honey

As with lots of raw treats, assembling these macaroons is incredibly simple. If your almonds are whole, blitz them in a food processor until they are finely ground. Zest and juice the lemon. In a large bowl mix the almond meal, lemon zest, coconut flakes, coconut butter and coconut oil. The mixture will be a bit crumbly – then add the lemon juice. The addition of the lemon juice will obviously moisten your mixture, then begin adding the honey 1 tablespoon at a time. I’d suggest tasting after 2 tablespoons of honey, depending on whether you are wanting a sweet or more of a tart treat.  Once it’s to your desired sweetness, form into small bite sized balls and roll in a touch more dried coconut flakes. Sit them on some wax paper in the fridge to firm up.  Store them in the fridge if they are not going to be used right away.

Image

Superpower Mint & Cacao Ice Cream

Image

I went to the farmers market a couple of days ago and walked out with such an abundance of fresh herbs… it was astounding. So delightful! My car smelled like heaven. Tiny bubbles of essential oils bursting off my lemon basil, Thai basil, apple mint, peppermint, cilantro and parsley.  Pure heaven. Something about the smell of basil…   I absolutely love it.  Basil and mint are definitely two of my favorites, and I buy them very frequently.

I had so much mint left over after infusing my water, making tea, glorifying salads…  you name it. The next logical venture was ice cream.  I won an ice cream maker at work some time ago and used it regularly for a while, after veering more towards an extremely limited animal product lifestyle I feel like I haven’t put that baby to use in ages!  With such a hot start to the weekend I was totally craving something icy and smooth…

Image

It had to be an ultra healthy ice cream…  but I really didn’t want it to be a banana base. I felt that banana would be a bit over powering, and I really wanted the beauty of the mint to shine. I also was bent on it being green, I considered macerating the mint leaves but opted for spirulina powder instead. It’s faster, greener, and with the added superpower nutrients.. the addition was a complete a no-brainer! Honey is always my first choice for sweetener, followed closely by maple syrup. I understand that honey is an animal product.. and strict vegans don’t eat it. Also I understand that maple syrup is not technically raw, stevia or agave are fine substitutes! This recipe is very straight forward, it does not require an ice cream maker…. although I did use mine because it was a lot easier than waiting for my tasty treat to freeze and I wanted to have some straight away!  Yum…  coconut, cacao, raw honey, and spirulina…  Could make Superfood Sundaes!

Image

Superpower Mint & Cacao Ice Cream

2 or 3 Cups of Young Coconut Meat*
1.5 Cups of Fresh Coconut Water*
Handful of Torn Mint Leaves
2 Tbsp Spirulina Powder
1/2 Cup Raw Cacao Nibs
3 Tbsp Raw Honey
(or agave, stevia, or whatever other sweetener you enjoy)

* If you cannot find young coconut meat & water or do not want to crack open your own young coconut…you could use 2 cans of coconut milk!

Blitz the young coconut meat, coconut water and honey in a blender until smooth and frothy. Transfer to a large chilled bowl. Add the mint, rubbing each leaf slightly before adding it into the bowl. This helps the oils release and will quickly infuse the coconut mixture with a minty taste and aroma, once the mint is finished add in the spirulina and stir well. Place the bowl in the fridge and allow it to get nice and cold, adding the cacao nibs right before you pour the mixture into the ice cream maker/freezer safe container. If using an ice cream maker, watch it after about 7 minutes because of the high water content it will start to freeze up in the middle while the outsides are still only slush.  Whether using an ice cream maker or not, I recommend freezing in a container such as a loaf pan, this will enable you to get a full rolling scoop once it’s frozen!

Image

Raw Chocolate Brownies with Raspberry Cacao Ganache

Image

This past weekend… a major food bomb went off in my kitchen. A raw food bomb. A raw…brownie bomb. There were tubs of nuts, seeds, berries, bags of cacao, and all kinds of utensils – everywhere. It was a crazy fun filled time for reinventing!

Inspired by the smell of freshly foraged wild roses from the river bank, and the abundance of cacao in my refrigerator….  I had the perfect idea for a raw brownie. Slightly sour raspberry “ganache” pairs beautifully with the rich raw brownie base.  These delightful squares are quite possibly my favorite creation – ever.
Raw, antioxidant and mineral rich brownies, incredibly decadent and healthy too!

Image

Raw Brownies with Raspberry Cacao Ganache

For the Brownie Base

1/2 Cup Raw Walnuts
1/2 Cup Raw Hazelnuts
1/2 Cup Raw Almonds
12-14 Medjool Dates
2/3 Cup Raw Cacao Powder
Fresh Squeezed Juice & Pulp of One Orange
1/3 Cup Flax Seeds

For the Ganache

1 Cup of Raspberries
3 Tbsp Raw Cacao Powder
1 Tbsp Raw Coconut Oil
1/3 Cup Chia Seeds

In a food processor, pulse the walnuts only until they are coarsely chopped then transfer to a medium sized bowl. Do the same with the hazelnuts, adding them to the walnuts once chopped. Following with the almonds, but pulse the almonds until they are a finer meal, transfer to the bowl.  In the same food processor, add the dates, the cacao, as well as the juice and pulp mixture from half of the orange. Pulse until the dates begin to break apart. Add in about half of the mixed nuts and flax seeds, along with remaining orange juice and pulp, continue pulsing until you have a mixture that resembles dark chocolate cake batter.  Scoop the batter mixture into the remaining nuts and fold until fully incorporated.  Line a square baking dish with parchment paper, scooping the brownie batter in and smoothing out the top as best you can.  Using a smaller food processor (or wash the one used for the base), blend all ganache ingredients together.  Expect the chia and raspberry seeds to supply texture, but otherwise you want it to be smooth. No berry chunks.  Top the brownie base with the raspberry ganache, and pop in the freezer to set for an hour or so. Image